
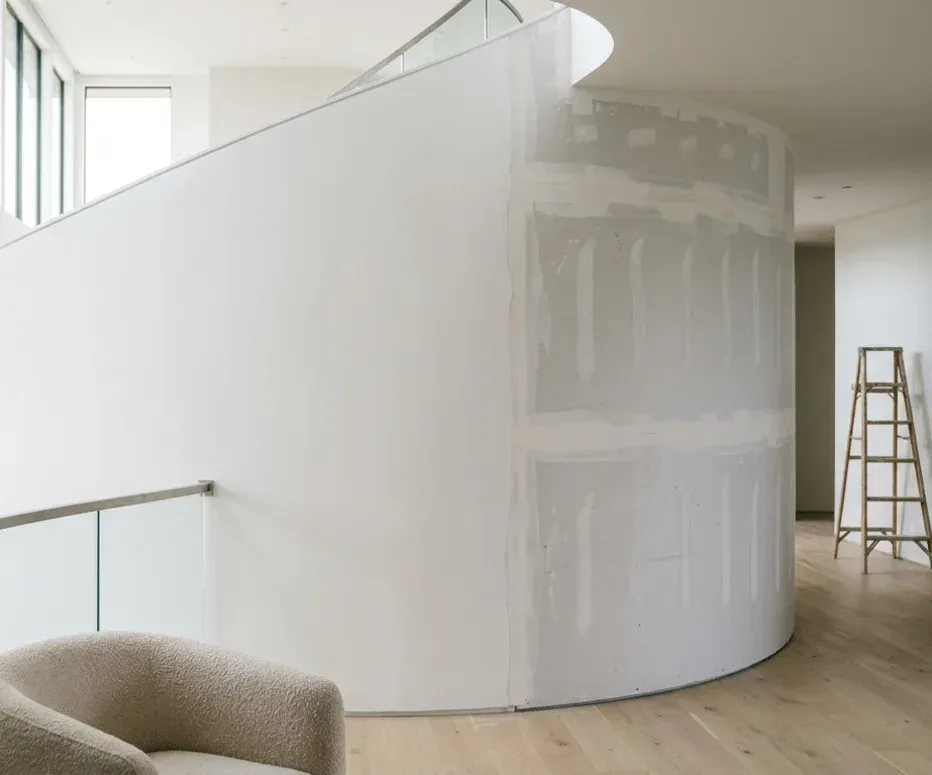
Signs you need this
- • Walls covered in years of small patches, nail holes, and texture inconsistencies that catch light unevenly once repainted.
- • A wall or ceiling that looks fine under normal light but shows every seam and old repair the moment a window or light fixture rakes across it.
- • Old plaster or drywall patched so many times it no longer reads as one continuous surface.
Providence Premier Drywall resurfaces rough, heavily patched, or inconsistent walls and ceilings to a true skim coat, and where the room calls for it, a full GA-214 Level 5 finish. A skim coat is a thin, full-surface layer of joint compound applied over the entire wall rather than just the seams and fasteners, which erases the small variations that a standard taping job leaves behind. Level 5 adds a final skim over the whole surface specifically to eliminate texture and imperfections that would otherwise show under critical or raking light, the finish designers specify for glossy paint, feature lighting, and high-end interiors.
What Level 5 actually solves
A Level 5 finish exists to solve one specific problem: light that travels across a wall at a low angle and finds everything a normal finish leaves behind. Under a soft ceiling fixture and flat paint, a Level 4 wall, taped seams and fastener heads coated smooth, looks perfectly fine. Put the same wall under a wide window, a skylight, a row of can lights, or a satin or gloss paint, and the light rakes across the surface at an angle that turns every seam, dimple, and sanding mark into a visible line. GA-214 defines Level 5 as a final skim coat applied across the entire surface, not just the joints, precisely to eliminate that texture difference between the taped areas and the field of the board. It is the finish designers specify when the lighting plan or the paint sheen will not forgive anything less, and it is not something you can add after the fact with a heavier coat of paint. It has to be built into the wall itself.
Resurfacing plaster and heavily patched walls
A lot of the demand for this work in Providence comes from older homes on the East Side and around Wayland Square, and from comparable high-end properties out in towns like Barrington, where the walls are original plaster or drywall that has been patched, repatched, and repainted for decades. Each patch is its own small imperfection, and stacked together over a wall’s lifetime they add up to a surface that no longer reads as one continuous plane, especially once a renovation brings in better lighting or a designer specs a paint finish that shows texture. Rather than tear that wall out, we bond and skim over sound old plaster, filling and leveling the accumulated history of small repairs under one full-surface coat. The original wall stays in place; what changes is the surface everyone actually sees and touches.
Why the process takes the time it takes
A true skim coat is a full-surface application, thin, but continuous across the whole wall or ceiling, and it has to cure between passes the same way any joint compound does. Rushing it defeats the purpose, since a skim coat applied too thick or sanded before it is fully cured tends to show shrinkage cracks or flashing once it is painted. On a Level 5 job we add a final full-surface skim on top of the standard taping work, then sand it under raking light, using a work light held at a low angle specifically to catch anything a normal overhead light would miss, before calling a wall finished. That extra pass is the difference between a wall that looks smooth under the light it was checked under and one that stays smooth under whatever light the finished room actually has.
Matching the finish to what the room needs
Not every wall in a house needs Level 5, and specifying it everywhere adds cost without adding anything the room will show. We walk a project room by room: a feature wall under gloss paint or a stairwell lit by a skylight is a clear Level 5 candidate, while a closet or a bedroom under flat paint and ordinary lighting does perfectly well at a standard Level 4 skim coat. Getting that match right, rather than defaulting to the highest finish level everywhere, is part of what keeps a resurfacing project on budget while still delivering a wall that holds up under the specific light it will actually live in.
Materials & standards
Products & materials we use
- Setting-type joint compound
- All-purpose and topping compound
- Plaster bonding agent
- PVA primer
Standards & codes we work to
- GA-214 finish Levels 0 through 5
- ASTM C840
- ASTM C1396
What the terms mean
- Skim coat
- Level 5 finish
- Critical light
- Raking light
- Resurfacing
- Plaster-to-drywall conversion
- Hot mud
- Corner bead
Options & variants
| Option | When it applies | Cost |
|---|---|---|
| Standard skim coat | Wall is basically sound but has minor texture inconsistencies or many small patches | Lower scope |
| Full GA-214 Level 5 finish | Room has critical or raking light, high-gloss paint, or a design spec calling for glass-smooth walls | Highest scope |
| Resurfacing over old plaster | Existing plaster is rough, crazed, or repeatedly patched but structurally sound | Adds a bonding step |
What affects cost
- • How much of the surface needs resurfacing, a single feature wall versus an entire room or whole floor.
- • Condition of the existing wall, since heavily patched or crazed plaster takes more prep and bonding work before the skim coat goes on.
- • Whether the finish target is a standard skim coat or a full Level 5, since Level 5's final skim over the entire surface adds a coat and a sanding pass most rooms do not need.
- • Lighting conditions in the room, since a wall under strong raking or critical light needs more careful leveling to disappear.
- • Paint sheen or wallcovering planned afterward, since gloss and satin paints show far more surface imperfection than flat paint does.
What to expect
- 1
Call and describe the room
You describe the room, the lighting it will sit under, and what the finish needs to support, whether that is a paint sheen, a wallcovering, or a design spec.
- 2
Assess the existing surface
We look at the existing wall or plaster condition and tell you honestly whether a standard skim coat or a full Level 5 is the right call.
- 3
Prep the surface
We clean, bond old plaster where needed, and tape any seams or cracks before compound goes on.
- 4
Apply the skim coat
We apply a thin, full-surface skim coat across the entire wall, not just the seams, letting it cure between passes.
- 5
Final skim and sand
On a Level 5 spec, we apply a final skim across the whole surface and sand it under raking light to catch anything normal light would miss.
- 6
Prime and walk the room
We prime the finished surface and walk it with you under the room's actual lighting before we call it done.
When this isn’t the right call
- If the wall is basically flat already and only has a few nail holes or small dings, standard patch and paint may be enough, not a full resurfacing.
- If the goal is disguising a patch inside existing knockdown or orange-peel texture rather than removing texture for a smooth wall, drywall texture matching is the better fit.
- If the ceiling is dated popcorn texture rather than a rough or heavily patched smooth wall, popcorn ceiling removal is the better fit.
Frequently asked questions
What is the actual difference between a Level 4 and a Level 5 finish? +
A Level 4 finish coats the taped seams and fastener heads, which is the standard most walls get and is fine under flat paint and ordinary light. A Level 5 adds a thin skim coat across the entire surface, seams and field alike, so there is no difference in texture anywhere on the wall. That extra skim is what keeps the wall from showing seam lines under raking light or glossy paint.
Do I need Level 5 everywhere, or just in certain rooms? +
Just where the lighting or finish demands it. A stairwell wall lit from a skylight, a media wall under gloss paint, or a room with large windows raking light across the surface are classic Level 5 candidates. A guest bedroom under flat paint and ordinary lighting usually does fine at Level 4.
Can you skim coat over old plaster instead of tearing it out? +
Often, yes. If the plaster is structurally sound but crazed, rough, or patched in too many places to read as one surface, we bond and skim over it rather than demoing and replacing, which saves time and keeps the original wall in place.
Why does my newly painted wall show every flaw it didn't seem to have before? +
Modern paint sheens and lighting are unforgiving. A satin or gloss paint reflects light instead of absorbing it, and raking light from a window or a can light grazes the surface at an angle that highlights every dip and seam a flat paint and softer light used to hide. That is usually the moment a homeowner calls about a skim coat.
How long does a Level 5 finish take compared to a standard job? +
Longer. The extra full-surface skim coat and the sanding pass under raking light add real time on top of a standard taping job, and each coat needs to cure before the next goes on. We give you a realistic timeline once we see the room and the finish target.
Will the skim coat show seams where old patches used to be? +
That is the point of a full skim coat: it goes over the entire surface, not just the repaired spots, so old patch lines get buried under one continuous layer of compound rather than blending awkwardly next to it.